Wosign Signature Tool Operation Manual
Ⅰ.Procedure Description
Wosign Signature Tool provides a visual interface for the Windows platform code signing, supports batch signatures, a variety of executable files, signature for package files, making it very easy and convenient for code signing.
Ⅱ.Operating environment
Windows XP and the above Version
Ⅲ.Operation steps
1. Download the Wosign Signature Tool wosigncode.exe, and save it in local path;
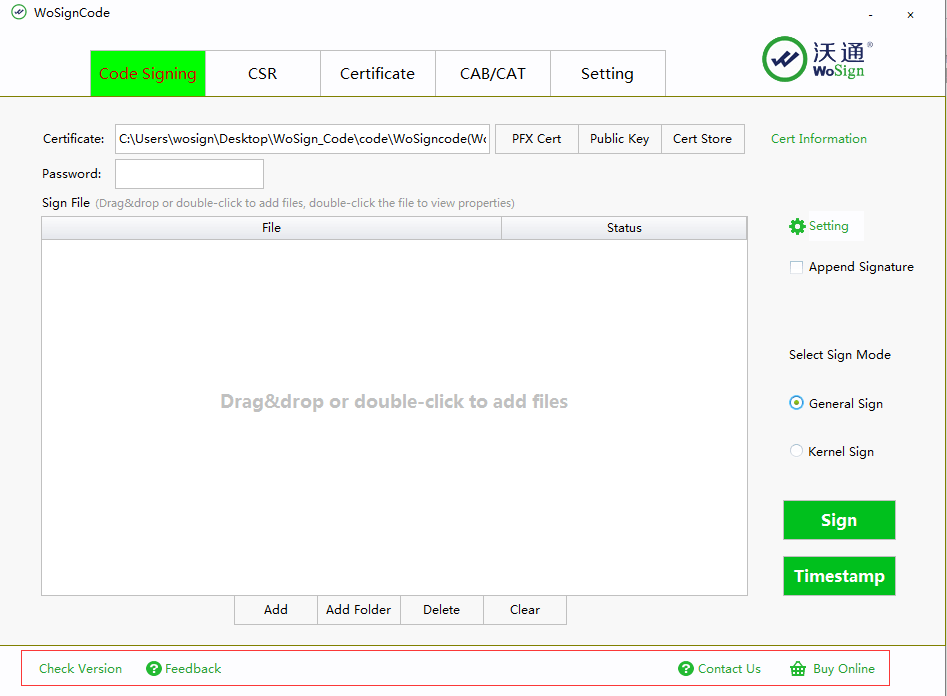
2. Run wosigncode.exe as administrator, then you can enter the user interface of Wosign Signature Tool;
3. Code signing instructions.
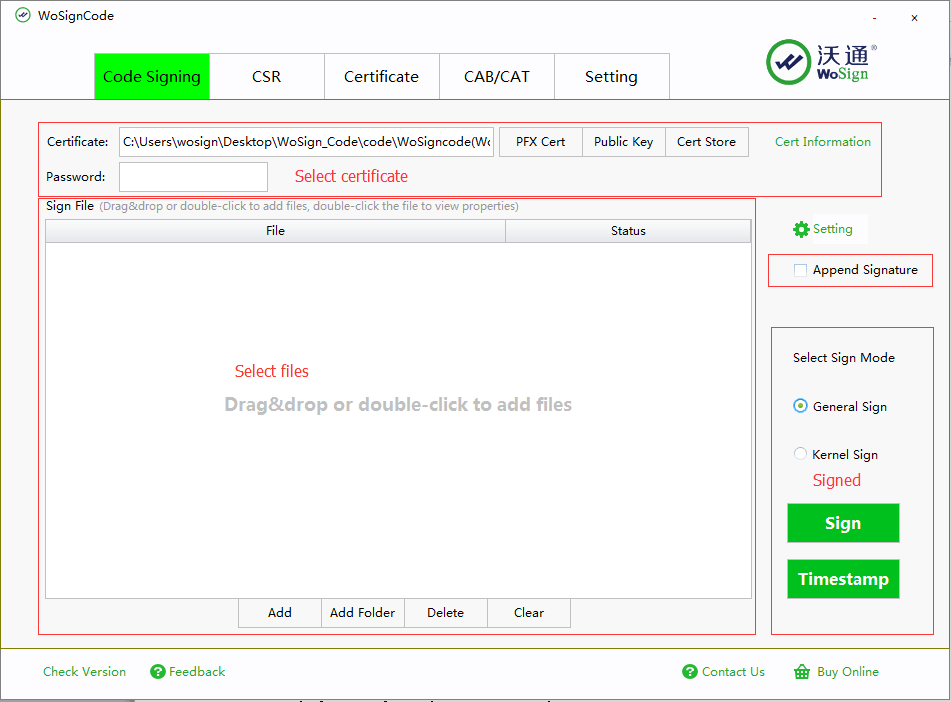
a. Run the Wosign Signature Tool; choose the certificate for the code signing.
- Click on “PFX certificate” button,just fill in the certificate password for the PFX format certificate.
- Click on “Cert Store” button to see all the valid Code Signing Certificates from the Local installation lists automatically, and please select the one you need.
- Click on “certificate information” link to show the detail of the code signing certificate.
b. Select the file you want to sign in the Selection blank.
- Wosign Signature Tool supports signing executable files(exe,dll,sys.ocx), and some other formats files(cab,cat,msi,msu).
- Three ways of selecting files to sign: drag drop, double clicking, and “Add” button.
- Support selecting batch files for signing at the same time.
- If you click on “Add Folder” button, the files in this folder can be directly selected.
- If you select the file in the list, and click on“Delete”button, then it will be deleted.
- If you click on “Clear”button, it will delete all the files in the list.
c. Select the mode of signing under the signature catalogs.
- Support Normal signing and Core signing two modes.
- When using the certificate not issued by Wosign to sign under Core signing mode, you need to import Cross root certificate stands by Microsoft .And no need for Cross root certificate when using Wosign certificate to sign.
d. Click on “sign” button,execute the signing operation, and wait till it is finished.
4. Additional Signing Operating Instructions.
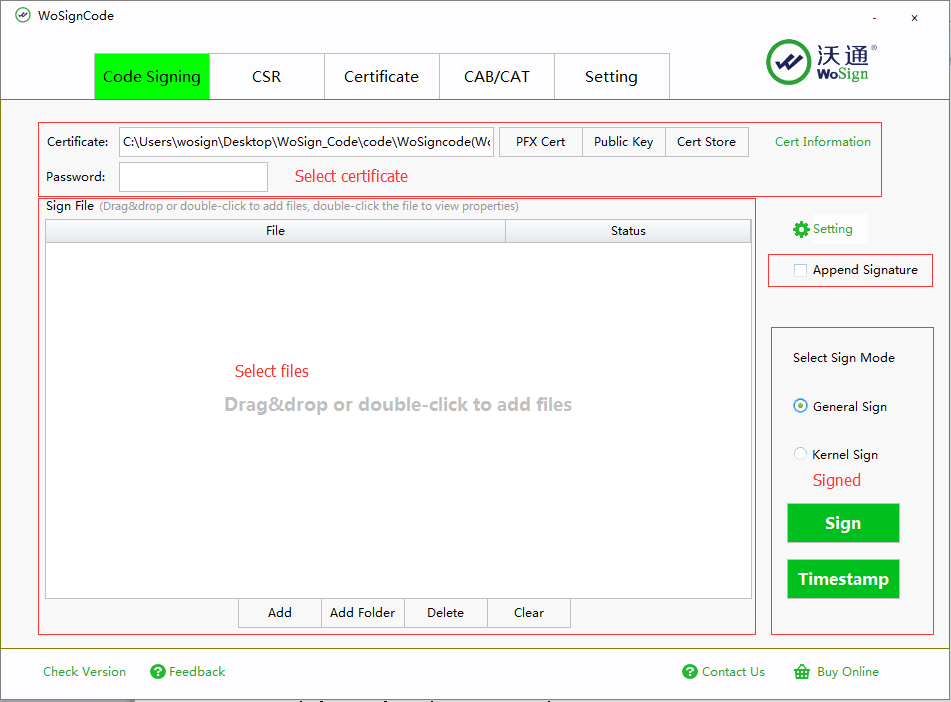
- If you want to add another signature to the signed file, just select the “Additional signature”menu and choose the file, then execute the sign operation.
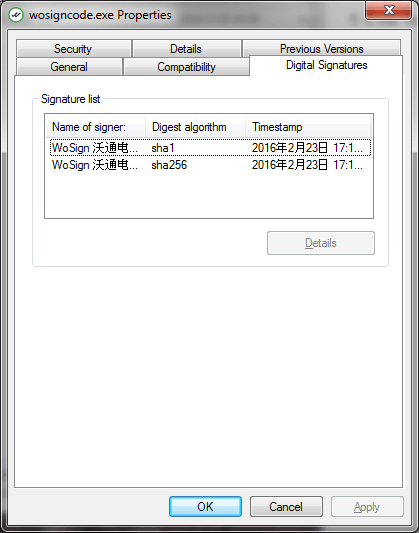
- Additional signature function supports using both SHA1 and SHA256 to sign the same one file, making the signed file compatible in different operating platforms.
- Sample of the Additional signed file is shown below.
5. CSR Operations Instruction.
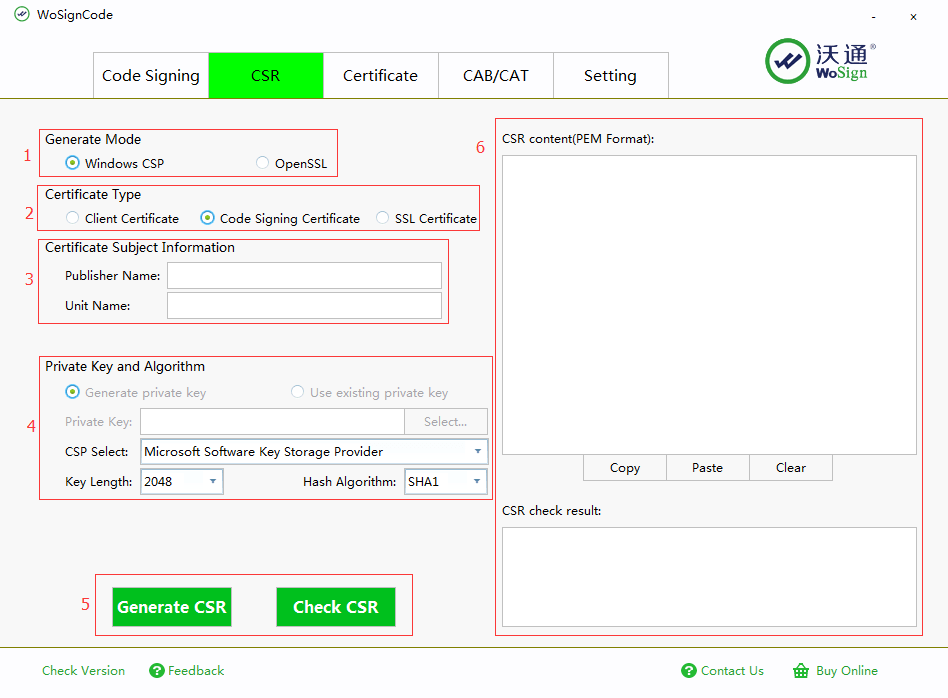
- Select the producing way of CSR in the frame 1.
- Select the type of certificate in the frame 2.
- Fill in the basic information of your certificate theme in the frame 3. You can also ignore it, doesn’t influence the function.
- Set the save path for the private key in the frame 4, select the type of CSP and length of private key.
- Click on the “Create CSR”button to generate the CSR file. Click on “Check CSR”, it can check the state of CSR. Just as the frame 5 shows above.
- The generated CSR or the result of CSR Checking will show in the frame 6.
6. Instructions of certificate operations.
6.1 Certificate installation.
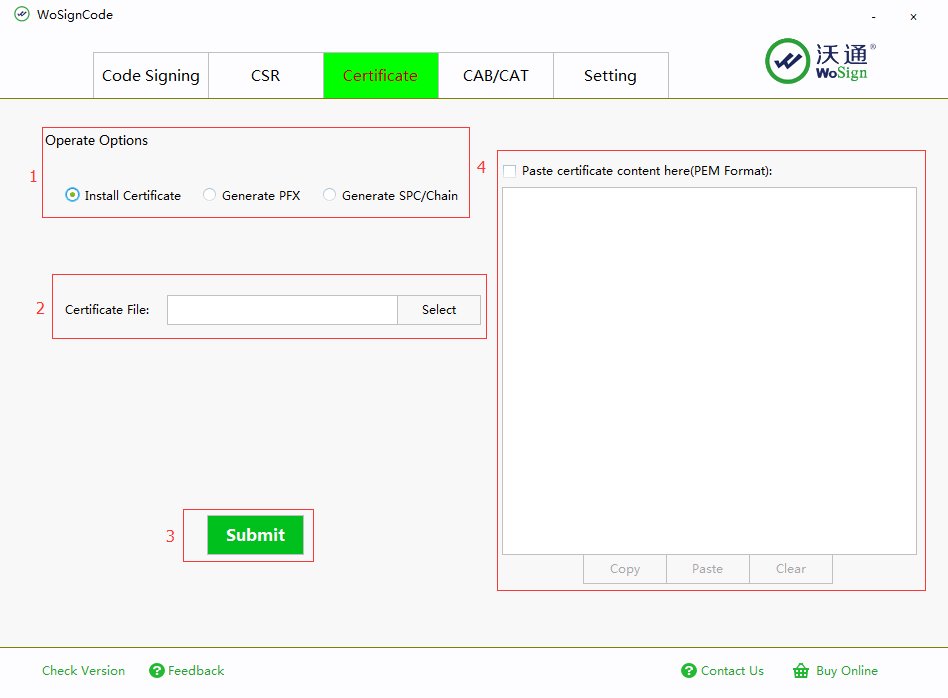
- Click on the “Install the certificate” button in the above frame 1.
- Select the certificate which needs to install in the frame 2. And you can also select the frame 4 on the right, paste the content of cert in the blank.
- Click on “Submit” button in the frame 3, and the certificate will be installed in your system.
6.2 Create PFX.
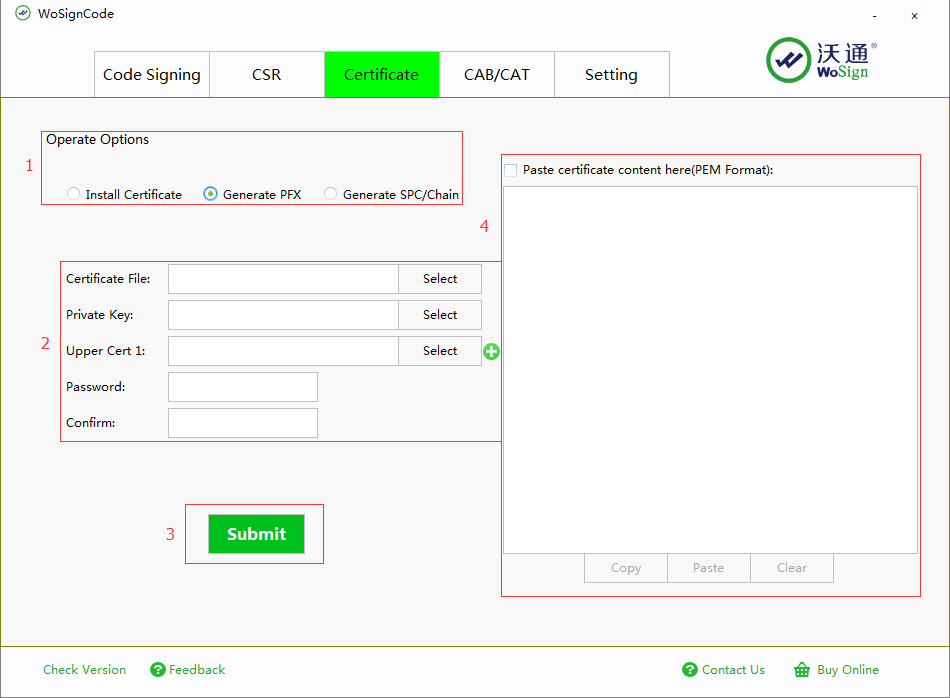
- Click on the “Create PFX” button in the above frame 1.
- Select the cert file, private key file, set a PFX password and confirm password in the frame 2.(If you paste the content of cert in the frame 4, then no need to select the certificate file.)
- Click on “Submit” button in the frame 3, and the PFX file will be created.
6.3 Create SPC.
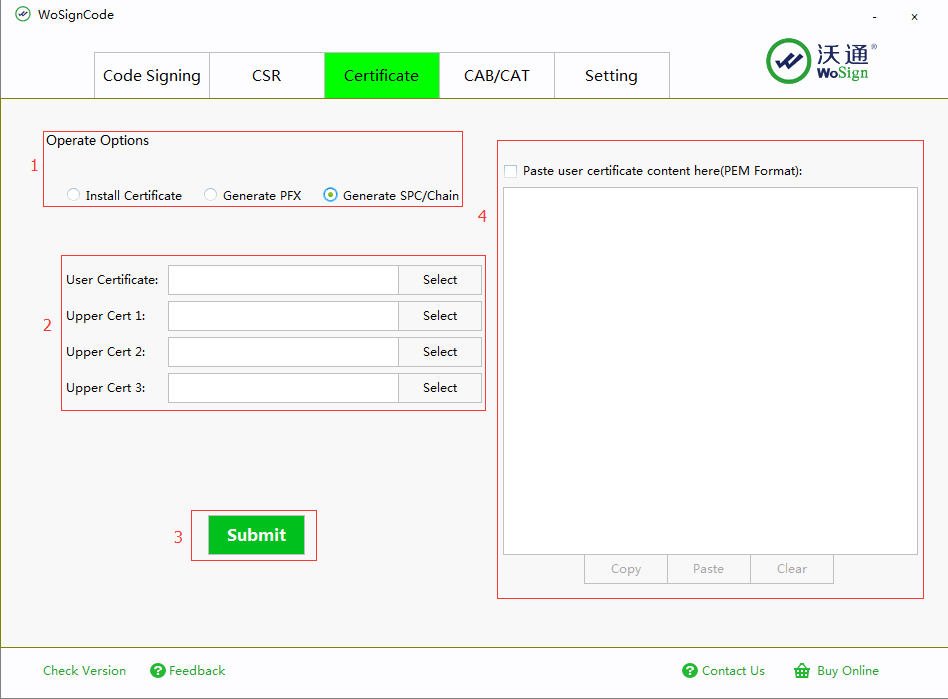
- Click on the “Create SPC” button in the above frame 1.
- Select the certificate file, and higher level certificate files (cannot exceed three levels) in the frame 2.(If you paste the content of cert in the frame 4, then no need to select the certificate file.)
- Click on “Perform operation” button in the frame 3, and the SPC file will be created.
7. CAB /CAT Operating Instructions.

a. Select the files that need to be zipped in the selecting frame. The selecting method and operation interface , button function are all the same with code signing files instructions.
b. Execute the operations, click on the buttons according to your needs in the operation frame.
- Click on “Create CAB” button and your files will be zipped into CAB format in your local path.
- Click on “Create CAT” button and your files will be zipped into CAT format in your local path.
- Select “Enter signing after creation” menu,when the files are zipped, it will switch into code sign interface automatically, adding the zipped files into the lists, waiting for signing.
8. Additional instructions.
